Building a floating dock might seem tricky, especially for those new to DIY projects. However, with the adaptability and versatility of floating docks, they are well worth the effort.
This article will provide you with detailed information on how to successfully construct your own floating dock in just one weekend! Stay tuned if mastering this skill is on your bucket list.
Key Takeaways
- Gather the necessary materials for building a floating dock, such as pressure – treated lumber, galvanized hardware, encapsulated floats, silicone caulking, and lag bolts.
- Prepare the build site, assemble the dock platform with joists and decking boards, create a floatation component using durable floats, and add accessories like cleats and ladders.
- Anchoring the dock is crucial for stability – use anchors, chains, stabilizing accessories like gangways or weights to secure your floating dock.
- Ensure stability by adding extra support with gangways or weights and use high – quality materials like plastic or composite decking for durability. Regular maintenance is essential to prolong the life of your floating dock.
The Harrison Dock Builders Difference
For those who prefer a professional touch or find the DIY approach a bit daunting, Harrison Dock Builders is here to help. Our team of experts specializes in crafting bespoke floating docks tailored to your specific needs. Check out our Residential Dock Building Service to discover how we can turn your waterfront dreams into reality.
Things to Consider Before Building a Floating Dock

Before starting the construction process, there are a few important factors to consider when building a floating dock.
Materials Needed for Building
Gathering the right materials is a vital step in the process of building a floating dock. Here’s what you’ll need:
- Pressure Treated Lumber: This strong wood can withstand different weather conditions and water exposure.
- Eye Hook: Used for securing ropes or chains to your dock.
- Galvanized Hardware: This stands up against rust, making it perfect for a structure that will be exposed to water regularly.
- Encapsulated Floats: They give your dock buoyancy, allowing it to float on the water surface.
- Silicone Caulking: Useful for sealing joints and preventing water infiltration.
- Lag Bolts and Galvanized Screws: They are used for assembling various parts of the dock and should resist rusting.
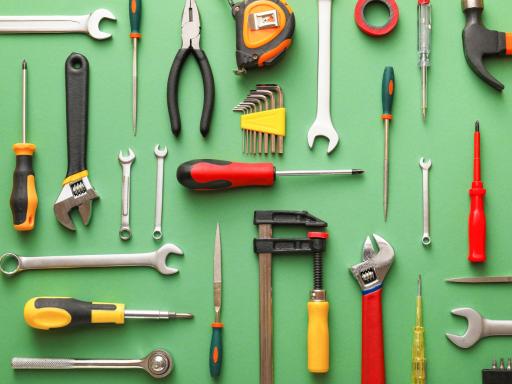
- Wrench: An essential tool, you’ll use this frequently throughout the process.
Steps to Building a Floating Dock

Learn the step-by-step process of building a floating dock, from preparing the build site to anchoring the dock – start your DIY project today!
Preparing the Build Site
Preparing the build site is a vital first step in constructing your wooden or floating steel dock. Follow these steps to get started:
- Start by collecting all essential materials. Pressure treated lumber, galvanized hardware and screws, lag bolts and encapsulated floats are key supplies needed.
- Determine the water depth at your chosen location. A small pond boat can help you measure this accurately.
- Select a suitable spot for your dock. The type of water and location significantly impact your build site preparation.
- Begin assembling the dock base using large planks of pressure treated pine. Secure them together with galvanized screws to form a sturdy platform.
- Ensure to add additional support for stability, precisely finishing off the square structure of the dock base.
- Prepare barrels or encapsulated floats for the next step in the building process. These will function as flotation devices, making your construction truly a “floating dock”.
- Seal all joints with silicone caulking. This prevents water from infiltrating any crevices on your wooden structure.
Assembling the Dock Platform
Crafting the platform serves as the heart of your floating dock project. Begin this stage by laying out four 8-foot-by-2-foot planks on a flat surface. Form these planks into an eight-foot square. Secure this structure in place using three-inch chemical-coated deck screws.
Creating a Floatation Component
To create a floatation component for your floating dock, follow these steps:
- Determine the weight capacity needed for your dock by considering the size and purpose of your dock.
- Choose the appropriate type and number of floats based on the weight capacity requirement.
- Ensure that the floats are made of durable materials, such as encapsulated floats, to withstand water exposure.
- Attach the floats securely to the dock frame using galvanized hardware and screws for added stability.
- Check that the floats are evenly spaced along the length of the dock to distribute weight evenly.
- Use lag bolts or other strong fasteners to secure the frame and floats together.
- Apply silicone caulking around all connections to prevent water from entering and damaging the floatation component.
Adding Accessories

Accessories can greatly enhance the functionality and aesthetics of your floating dock. Here are some accessories to consider:
- Dock Cleats: These sturdy metal or plastic hooks provide a convenient place to tie up your boat or attach ropes.
- Ladders: Installing a ladder makes it easy to get in and out of the water, ensuring safety and convenience.
- Bumpers: Protect your dock and boats from damage by adding bumpers along the edges. These can be made of rubber or foam.
- Solar Lights: Illuminate your dock at night with solar-powered lights, creating a welcoming and safe environment.
- Benches: Add seating options to your dock with benches or chairs, allowing you to relax and enjoy the surrounding views.
- Fish Cleaning Station: If you plan on fishing, consider adding a fish cleaning station with a built-in sink and cutting board for easy cleaning.
- Kayak Racks: Keep your kayaks organized and out of the way by installing racks specifically designed for kayaks.
- Umbrella Holders: Provide shade on hot days by adding umbrella holders that can be easily attached to the dock.
Anchoring the Dock
To ensure stability and prevent drifting, anchoring the wooden dock is an essential step in building a floating dock, no matter the dock weight. Here are some key methods to anchor your dock:
- Maneuver anchors: Using a wood plank, guide the anchors to the bottom of the seafloor in strategic locations.
- Attach chains: Securely attach chains from the anchors to the corners of the floating dock for added stability.
- Stabilizing accessories: Consider using additional stabilizing accessories such as gangways, weights, piling, shore attachments, or a floating dock stabilizer.
Tips for Building a Successful Floating Dock

Ensure stability by adding extra support and using quality materials. Proper maintenance is essential for longevity. Read more to learn how to build a successful floating dock.
Adding Extra Support for Stability
To ensure the stability of your floating dock, it’s important to add extra support both water and land side. There are various ways you can achieve this. One option is to use gangways, which connect the dock to the shore and provide additional stability.
Another option is to attach weights along the length of the dock platform, such as concrete or metal blocks, which can help counterbalance any movement. Piling or shore attachments can also be used for added stability.
Additionally, consider using a floating dock stabilizer system designed specifically for stabilizing docks in rough conditions. By incorporating these measures into your build, you’ll create a sturdy and secure floating dock that will withstand waves and currents with ease.
Using Quality Materials
Using high-quality materials is crucial when building a floating dock. The durability and longevity of the dock depend on it. Plastic is considered the most durable material among the commonly used options for floating docks.
It can withstand various weather conditions and requires minimal maintenance. Wood, on the other hand, needs regular upkeep to ensure its durability as a floating dock material. Composite and aluminum are also popular choices for decking materials in floating dock systems due to their strength and resistance to decay.
When selecting materials, consider factors such as water depth, load capacity, and the specific requirements of your project. By using quality materials, you can build a strong and reliable floating dock that will last for years to come.
Proper Maintenance for Longevity
To ensure the longevity of your floating dock, proper maintenance is key. Regularly inspect your dock for any signs of damage or wear and tear. If you have an EZ Dock or AccuDock, minimal maintenance is required as they are designed to be low maintenance.
However, it’s still a good idea to clean them regularly to keep them looking their best. Staining may only be necessary every few years, but make sure to thoroughly clean and prep the dock before staining.
For docks with TimberTech decking, sweeping regularly can help remove debris and keep it clean. By taking care of your floating dock, you can enjoy its benefits for years to come without having to worry about frequent repairs or replacements.
Conclusion
In conclusion, building a floating dock can be a rewarding DIY project for beginners. By following the steps outlined in this guide and considering important factors such as water type and location, you can create a versatile and sturdy dock that will last for years to come.
Remember to use quality materials, follow proper guidelines, and maintain your dock regularly to ensure its longevity. So grab your tools and get started on building your very own floating dock!
FAQs
1. What is a DIY floating dock?
A DIY floating dock is an accessible, homemade platform that floats on water, which you can build yourself.
2. How can I learn how to build a floating dock?
You can easily master building a floating dock by following our DIY guide for beginners, which provides step-by-step instructions and tips.
3. What considerations should I keep in mind when building my own dock?
When planning to build your own floating dock, take into account factors like the weight of the people or objects it will hold and the materials required for stable buoyancy.
4. Can I enjoy drinking beer while working on my DIY project?
Our recommendation would be to avoid drinking alcohol when working on any potentially dangerous project. Many folks enjoy having a chilled beer handy as they work on their projects; however, always prioritize safety first when using tools and working near water.


